I accidentally wide out my 200 and some gigabytes of mp3 (again) by rsync'ing between bad disk. Luckily I found this undelete program and recover most of them.
http://extundelete.sourceforge.net
Also check out this great article if you're techie: http://carlo17.home.xs4all.nl/howto/undelete_ext3.html
2011/08/26
2011/05/07
Install Google Chrome on RHEL
This howto explains howto install Google Chrome Web browser on Fedora 14, Fedora 13, Fedora 12 and Red Hat 6 (RHEL 6). Best way to install and keep up-to-date with Google Chrome browser is use Google’s own YUM repository.
32-bit
64-bit
Note: Both 32-bit and 64-bit repos can be placed in the same file.
1. Enable Google YUM repository
Add following to /etc/yum.repos.d/google.repo file:32-bit
[google]
name=Google - i386
baseurl=http://dl.google.com/linux/rpm/stable/i386
enabled=1
gpgcheck=1
gpgkey=https://dl-ssl.google.com/linux/linux_signing_key.pub
[google64]
name=Google - x86_64
baseurl=http://dl.google.com/linux/rpm/stable/x86_64
enabled=1
gpgcheck=1
gpgkey=https://dl-ssl.google.com/linux/linux_signing_key.pub
2. Install Google Chrome with YUM (as root user)
Install Google Chrome Stable Version
## Install Google Chrome Stable version ##
yum install google-chrome-stable
Install Google Chrome Beta Version
## Install Google Chrome Beta version ##
yum install google-chrome-beta
Install Google Chrome Unstable Version
## Install Google Chrome Unstable version ##
yum install google-chrome-unstable
2011/03/07
2011/02/10
Building HandBrakeCLI for CentOS
Problem with CentOS & other RHEL is that it's packages are updated slowly. Building software like Handbrake needs additional steps.
1. First of all, you need to have the essential development tools:
2. Build Autoconf 2.61 (stock is 2.59) and install to /opt
3. Use the 2.61 version
4. Greb latest source from subversion or download from Handbrake source.
Here we assume you download the tar source:
5. Config & build
GUI version is no supported according to the Handbrake forum. --disable-gtk option will generate CLI build.
it's gonna take awhile depending on your hardware...
6. Install
If no other trouble, you get the success build result. Now install it:
This will copy the build to /usr/local/bin/HandBrakeCLI and now enjoy the work!
Reference:
1. First of all, you need to have the essential development tools:
yum groupinstall "Development Tools" "Development Libraries" \

"X Software Development" "GNOME Software Development"


yum install yasm zlib-devel bzip2-devel \

dbus-glib-devel libgudev1-devel webkitgtk-devel libnotify-devel \

gstreamer-devel gstreamer-plugins-base-devel
2. Build Autoconf 2.61 (stock is 2.59) and install to /opt
wget http://ftp.gnu.org/gnu/autoconf/autoconf-2.61.tar.bz2

tar xjf autoconf-2.61.tar.bz2

cd autoconf-2.61

./configure --prefix=/opt

make

sudo make install
3. Use the 2.61 version
export PATH=/opt/bin:$PATH4. Greb latest source from subversion or download from Handbrake source.
Here we assume you download the tar source:
wget http://handbrake.fr/rotation.php?file=HandBrake-0.9.5.tar.bz2

tar zxvf HandBrake-0.9.5.tar.gz
5. Config & build
GUI version is no supported according to the Handbrake forum. --disable-gtk option will generate CLI build.
cd HandBrake-0.9.5

./configure --disable-gtk --launch
it's gonna take awhile depending on your hardware...
-------------------------------------------------------------------------------
time end: Thu Feb 10 12:57:49 2011
duration: 20 minutes, 2 seconds (1202.42s)
result: SUCCESS
-------------------------------------------------------------------------------
Build is finished!
6. Install
If no other trouble, you get the success build result. Now install it:
cd build

make install
This will copy the build to /usr/local/bin/HandBrakeCLI and now enjoy the work!
HandBrakeCLI --helpReference:
2010/04/08
RHEL: Install GNOME from console
this will do:
To start the desktop, just type
yum groupinstall "X Window System" "GNOME Desktop Environment"
To start the desktop, just type
startx
2010/03/24
2010/02/11
Linux: Find and remove files recursively
find . -type f -name "*.log" -exec rm -f {} \;
Remember to switch to the directory you're working on..
http://www.cyberciti.biz/faq/linux-unix-how-to-find-and-remove-files/
2009/12/25
Linux & NTFS
http://wiki.centos.org/zh-tw/TipsAndTricks/NTFS
1. Install
2. Mount it
That's it.
1. Install
yum --enablerepo=rpmforge install fuse fuse-ntfs-3g2. Mount it
mount /dev/The_NTFS_PARTION /the_mount_pointThat's it.
2009/11/12
ssh via apache deamon user
Scenario: You have a web script (php, ruby, python, or so) that need to ssh over a remote machine to do stuff. How you do set up ssh key for the apache deamon user?
After some dig out, here's the steps, mostly taken from (Boredworkers.com):
Make key for apache daemon
1. log in to source server as root
2. create .ssh directory for apache user. Make sure you have the ownership right:
3. Generate the ssh-key authentication key as user apache using sudo. Use the default file location and leave empty when prompted for passphrase.
4. Append apache's public key to destination server
5. Test the set up. You’ll see that you can now run ssh commands without being prompted for the user password:
refernce: http://www.boredworkers.com/2009/08/24/script-tips-ssh-key-for-apache/
After some dig out, here's the steps, mostly taken from (Boredworkers.com):
Make key for apache daemon
1. log in to source server as root
2. create .ssh directory for apache user. Make sure you have the ownership right:
$ mkdir /var/www/.ssh

$ chown -R apache:nobody /var/www/.ssh
3. Generate the ssh-key authentication key as user apache using sudo. Use the default file location and leave empty when prompted for passphrase.
$ sudo -u apache ssh-keygen -t rsa
4. Append apache's public key to destination server
$ sudo -u apache cat .ssh/id_rsa.pub | ssh dest_user@dest_server 'cat >> ~/.ssh/authorized_keys'
5. Test the set up. You’ll see that you can now run ssh commands without being prompted for the user password:
$ sudo -u apache ssh dest_user@dest_server
refernce: http://www.boredworkers.com/2009/08/24/script-tips-ssh-key-for-apache/
2009/10/23
REHL: mount iso images
Below is the way to mount iso image file in REHL system:
Before you start to mount your iso image, you need to ensure the folder /mnt/isoimage is available, if /mnt/isoimage is not available just create one using command below:-
* Once isoimage directory is available, you can use the command below to mount your iso image
* You just mount your iso image file to /mnt/isoimage successfully. To access your iso image files, go to /mnt/isoimage
Once you finish using your files, below is the way to unmount your iso image:-
Before you start to mount your iso image, you need to ensure the folder /mnt/isoimage is available, if /mnt/isoimage is not available just create one using command below:-
#mkdir /mnt/isoimage * Once isoimage directory is available, you can use the command below to mount your iso image
# mount -o loop -t iso9660 myisoimage.iso /mnt/isoimage/* You just mount your iso image file to /mnt/isoimage successfully. To access your iso image files, go to /mnt/isoimage
Once you finish using your files, below is the way to unmount your iso image:-
# umount /mnt/isoimage
2009/09/26
REHL: rsync setup & ssh keys
Have you ever wanted to know how to easily synchronize the data between multiple servers automatically?
rsync is the anwser. And here's some note. We will use rsync, ssh key authentication, and a cron job.
Let’s call the 2 servers "SOURCESERVER" and "DESTSERVER" for:
SOURCESERVER = Source server (the server we’re connecting from to upload the data)
DESTSERVER = Destination server (the server we’re connecting to receive the data)
Part 1 - Setting up SSH key authentication
First, we need to make sure the DESTSERVER has the ability to use key authentication enabled. Find your sshd configuration file (usually /etc/ssh/sshd_config) and enable the following options if they are not already set.
If you edit the file be sure to restart sshd afterwards.
Next, on the SOURCESERVER we will create the public & private key pair to be used for authentication with the following command:
*Note 1: Do not enter a passphrase for this, just hit enter when prompted.
*Note 2: if SOURCESERVER doesn't have key yet, do the keygen as well.
This should create 2 files in ~/.ssh folder, a public key file (id_dsa) and a private key file (id_dsa.pub).
The private key file (~/.ssh/id_dsa) we will keep on the SOURCESERVER.
*Be sure to keep this private key safe. With it anyone will be able to connect to the DESTSERVER that contains the public key.
Now we will add the public key we created on to the DESTSERVER.
Choose the user account which you will use to connect to on DESTSERVER, we'll call this user ‘destuser’ for now.
The public key file (~/.ssh/id_dsa.pub) we will upload to the DESTSERVER, and call it SOURCESERVER.pub.
On the DESTSERVER, in the DESTUSER's home directory, in the .ssh folder, create a new text file called "authorized_keys".
If it already exists, great, we will use the existing authorized_keys file to add the SOURCESERVER's public key.
Be sure the permissions for key files are 600 and 700 for the ‘.ssh’ folder.
Now to test that the keys are working. From the SOURCESERVER try logging in as normal using ssh to the DESTSERVER.
If all is working you should not be prompted for a password and able to connected directly to a shell on the DESTSERVER.
Part 2 - Creating the rsync script
Now for the rsync script. I use a simple script such as the following
Copy this file into the home directory of the sourceuser on the SOURCESERVER and modify the first 4 variables in the file.
SOURCEPATH (Source path to be synced)
DESTPATH (Destination path to be synced)
DESTHOST (Destination IP address or host name)
DESTUSER (User on the destination server)
Save it as something like ‘rsync.sh’
Set the permissions on the file to 700.
Now you should be able to run the script, have it connect to the DESTSERVER, and transfer the files all without your interaction.
The script will send all output to the ‘rsync.log’ file specified in the script.
Part 3 - Setting up the cron job
Assuming everything has worked so far all that’s left is to setup a cron job to run the script automatically at a predefined interval.
As the same sourceuser use the ‘crontab’ command to create a new cron job.
This will open an editor where you can schedule the job. Enter the following to have the script run once every hour:
Your 2 servers should now be syncing the chosen directory once every hour.
rsync is the anwser. And here's some note. We will use rsync, ssh key authentication, and a cron job.
Let’s call the 2 servers "SOURCESERVER" and "DESTSERVER" for:
SOURCESERVER = Source server (the server we’re connecting from to upload the data)
DESTSERVER = Destination server (the server we’re connecting to receive the data)
Part 1 - Setting up SSH key authentication
First, we need to make sure the DESTSERVER has the ability to use key authentication enabled. Find your sshd configuration file (usually /etc/ssh/sshd_config) and enable the following options if they are not already set.
RSAAuthentication yes

PubkeyAuthentication yes

AuthorizedKeysFile .ssh/authorized_keys
If you edit the file be sure to restart sshd afterwards.
#service sshd restartNext, on the SOURCESERVER we will create the public & private key pair to be used for authentication with the following command:
ssh-keygen -t dsa
*Note 1: Do not enter a passphrase for this, just hit enter when prompted.
*Note 2: if SOURCESERVER doesn't have key yet, do the keygen as well.
This should create 2 files in ~/.ssh folder, a public key file (id_dsa) and a private key file (id_dsa.pub).
The private key file (~/.ssh/id_dsa) we will keep on the SOURCESERVER.
*Be sure to keep this private key safe. With it anyone will be able to connect to the DESTSERVER that contains the public key.
chmod 700 ~/.ssh

chmod -R 600 ~/.ssh/*
Now we will add the public key we created on to the DESTSERVER.
Choose the user account which you will use to connect to on DESTSERVER, we'll call this user ‘destuser’ for now.
The public key file (~/.ssh/id_dsa.pub) we will upload to the DESTSERVER, and call it SOURCESERVER.pub.
scp ~/.ssh/id_dsa.pub DESTUSER@DESTSERVER:~/.ssh/SOURCESERVER.pubOn the DESTSERVER, in the DESTUSER's home directory, in the .ssh folder, create a new text file called "authorized_keys".
touch ~/.ssh/authorized_keysIf it already exists, great, we will use the existing authorized_keys file to add the SOURCESERVER's public key.
cat ~/.ssh/SOURCESERVER.pub >> ~/.ssh/authorized_keysBe sure the permissions for key files are 600 and 700 for the ‘.ssh’ folder.
Now to test that the keys are working. From the SOURCESERVER try logging in as normal using ssh to the DESTSERVER.
# ssh destuser@DESTSERVERIf all is working you should not be prompted for a password and able to connected directly to a shell on the DESTSERVER.
Part 2 - Creating the rsync script
Now for the rsync script. I use a simple script such as the following
#!/bin/bash


SOURCEPATH=’/source/directory’

DESTPATH=’/destination’

DESTHOST=’123.123.123.123′

DESTUSER=’destuser’

LOGFILE=’rsync.log’


echo $’\n\n’ >> $LOGFILE

rsync -av –rsh=ssh $SOURCEPATH $DESTUSER@$DESTHOST:$DESTPATH 2>&1 >> $LOGFILE

echo “Completed at: `/bin/date`” >> $LOGFILE
Copy this file into the home directory of the sourceuser on the SOURCESERVER and modify the first 4 variables in the file.
SOURCEPATH (Source path to be synced)
DESTPATH (Destination path to be synced)
DESTHOST (Destination IP address or host name)
DESTUSER (User on the destination server)
Save it as something like ‘rsync.sh’
Set the permissions on the file to 700.
# chmod 700 rsync.shNow you should be able to run the script, have it connect to the DESTSERVER, and transfer the files all without your interaction.
The script will send all output to the ‘rsync.log’ file specified in the script.
Part 3 - Setting up the cron job
Assuming everything has worked so far all that’s left is to setup a cron job to run the script automatically at a predefined interval.
As the same sourceuser use the ‘crontab’ command to create a new cron job.
# crontab -e
This will open an editor where you can schedule the job. Enter the following to have the script run once every hour:
# Run my rsync script once every hour

0 * * * * /path/to/rsync.sh
Your 2 servers should now be syncing the chosen directory once every hour.
2009/09/06
Drupal install on CentOS5
PHP 5.3 is not supported on current Drupal (6.14), and CentOS's PHP version is still on 5.1.9. So the drupal installation needs a little bit of work.
1. Install MySQL 5.1
2. Install PHP 5.2.9 from CentOS testing repository:
3. drupal clean URL config (sample)
there are many ways to turn on clean URL. Here's how I do it:
4. PHP.ini
modify the following keys, this is my settings:
5. upload progress
add the extension to php.ini:
if you don't have gcc installed:
install pecl related if you don't have them yet:
install the upload progress:
edit your /etc/php.ini and add this line under extension section:
6. GD library
6. Install drupal
1. Install MySQL 5.1
cd /etc/yum.repos.d

wget wget http://rpms.famillecollet.com/enterprise/remi-release-5.rpm

yum --enablerepo=remi install mysql mysql-server mysql-devel mysql-libs
2. Install PHP 5.2.9 from CentOS testing repository:
cd /etc/yum.repos.d

wget http://dev.centos.org/centos/5/CentOS-Testing.repo

yum --enablerepo=c5-testing install php php-devel php-pear php-pecl php-mcrypt php-xml php-xml php-imap php-soap php-mbstring php-mysql php-cli php-mysql
3. drupal clean URL config (sample)
there are many ways to turn on clean URL. Here's how I do it:
AllowOverride All

Options Indexes FollowSymLinks MultiViews

Order allow,deny

Allow from all


RewriteEngine on

RewriteBase /

RewriteCond %{REQUEST_FILENAME} !-f

RewriteCond %{REQUEST_FILENAME} !-d

RewriteRule ^(.*)$ index.php?q=$1 [L,QSA]

Alias /drupal /var/www/drupal
4. PHP.ini
modify the following keys, this is my settings:
max_input_time = 100    ; Maximum amount of time each script may spend parsing request data

memory_limit = 100M      ; Maximum amount of memory a script may consume (16MB)

error_reporting  =  E_ALL

memory_limit = 100M      ; Maximum amount of memory a script may consume (16MB)

upload_max_filesize = 100M
5. upload progress
add the extension to php.ini:
if you don't have gcc installed:
yum -y groupinstall "Development Tools"install pecl related if you don't have them yet:
yum -y install php-devel php-pecl php-pear
install the upload progress:
pecl install uploadprogress
edit your /etc/php.ini and add this line under extension section:
extension=uploadprogress.so
6. GD library
yum --enablerepo=c5-testing install gd gd-devel php-gd
6. Install drupal
2009/07/22
Installing PECL uploadprogress Extension for Drupal (RHEL)
The PECL uploadprogress modules allows a user to see a upload progress bar.
This is a great UI that makes uploading in action and hence good user experience.
To intall uploadprogress module:
1. install php development, pecl, pear, and development tools if you not yet have them installed:
2. install the upload progress:
This is what you should get:
3. add the extension to php.ini:
4. restart apache for the changes to take effect.
This is a great UI that makes uploading in action and hence good user experience.
To intall uploadprogress module:
1. install php development, pecl, pear, and development tools if you not yet have them installed:
yum -y install php-devel php-pecl php-pear

yum -y groupinstall "Development Tools"
2. install the upload progress:
pecl install uploadprogress
This is what you should get:
[root@xxx]# pecl install uploadprogress

downloading uploadprogress-1.0.1.tgz ...

Starting to download uploadprogress-1.0.1.tgz (8,536 bytes)

.....done: 8,536 bytes

4 source files, building

running: phpize

Configuring for:

PHP Api Version:         20041225

Zend Module Api No:      20060613

Zend Extension Api No:   220060519

building in /var/tmp/pear-build-root/uploadprogress-1.0.1

running: /var/tmp/uploadprogress/configure

checking for egrep... grep -E

checking for a sed that does not truncate output... /bin/sed

checking for cc... cc

checking for C compiler default output file name... a.out

checking whether the C compiler works... yes

checking whether we are cross compiling... no

checking for suffix of executables...

checking for suffix of object files... o

checking whether we are using the GNU C compiler... yes

checking whether cc accepts -g... yes

checking for cc option to accept ANSI C... none needed

checking how to run the C preprocessor... cc -E

checking for icc... no

checking for suncc... no

checking whether cc understands -c and -o together... yes

checking for system library directory... lib

checking if compiler supports -R... no

checking if compiler supports -Wl,-rpath,... yes

checking build system type... i686-redhat-linux-gnu

checking host system type... i686-redhat-linux-gnu

checking target system type... i686-redhat-linux-gnu

checking for PHP prefix... /usr

checking for PHP includes... -I/usr/include/php -I/usr/include/php/main -I/usr/include/php/TSRM -I/usr/include/php/Zend -I/usr/include/php/ext -I/usr/include/php/ext/date/lib

checking for PHP extension directory... /usr/lib/php/modules

checking for PHP installed headers prefix... /usr/include/php

checking if debug is enabled... no

checking if zts is enabled... no

checking for re2c... no

configure: WARNING: You will need re2c 0.13.4 or later if you want to regenerate PHP parsers.

checking for gawk... gawk

checking whether to enable uploadprogress functions... yes, shared

checking for ld used by cc... /usr/bin/ld

checking if the linker (/usr/bin/ld) is GNU ld... yes

checking for /usr/bin/ld option to reload object files... -r

checking for BSD-compatible nm... /usr/bin/nm -B

checking whether ln -s works... yes

checking how to recognise dependent libraries... pass_all

checking for ANSI C header files... yes

checking for sys/types.h... yes

checking for sys/stat.h... yes

checking for stdlib.h... yes

checking for string.h... yes

checking for memory.h... yes

checking for strings.h... yes

checking for inttypes.h... yes

checking for stdint.h... yes

checking for unistd.h... yes

checking dlfcn.h usability... yes

checking dlfcn.h presence... yes

checking for dlfcn.h... yes

checking for g77... no

checking for f77... no

checking for xlf... no

checking for frt... no

checking for pgf77... no

checking for fort77... no

checking for fl32... no

checking for af77... no

checking for f90... no

checking for xlf90... no

checking for pgf90... no

checking for epcf90... no

checking for f95... f95

checking whether we are using the GNU Fortran 77 compiler... yes

checking whether f95 accepts -g... yes

checking the maximum length of command line arguments... 32768

checking command to parse /usr/bin/nm -B output from cc object... ok

checking for objdir... .libs

checking for ar... ar

checking for ranlib... ranlib

checking for strip... strip

checking if cc supports -fno-rtti -fno-exceptions... no

checking for cc option to produce PIC... -fPIC

checking if cc PIC flag -fPIC works... yes

checking if cc static flag -static works... yes

checking if cc supports -c -o file.o... yes

checking whether the cc linker (/usr/bin/ld) supports shared libraries... yes

checking whether -lc should be explicitly linked in... no

checking dynamic linker characteristics... GNU/Linux ld.so

checking how to hardcode library paths into programs... immediate

checking whether stripping libraries is possible... yes

checking if libtool supports shared libraries... yes

checking whether to build shared libraries... yes

checking whether to build static libraries... no

configure: creating libtool

appending configuration tag "CXX" to libtool

appending configuration tag "F77" to libtool

checking if libtool supports shared libraries... yes

checking whether to build shared libraries... yes

checking whether to build static libraries... no

checking for f95 option to produce PIC... -fPIC

checking if f95 PIC flag -fPIC works... yes

checking if f95 static flag -static works... yes

checking if f95 supports -c -o file.o... yes

checking whether the f95 linker (/usr/bin/ld) supports shared libraries... yes

checking dynamic linker characteristics... GNU/Linux ld.so

checking how to hardcode library paths into programs... immediate

configure: creating ./config.status

config.status: creating config.h

running: make

/bin/sh /var/tmp/pear-build-root/uploadprogress-1.0.1/libtool --mode=compile cc  -I. -I/var/tmp/uploadprogress -DPHP_ATOM_INC -I/var/tmp/pear-build-root/uploadprogress-1.0.1/include -I/var/tmp/pear-build-root/uploadprogress-1.0.1/main -I/var/tmp/uploadprogress -I/usr/include/php -I/usr/include/php/main -I/usr/include/php/TSRM -I/usr/include/php/Zend -I/usr/include/php/ext -I/usr/include/php/ext/date/lib  -DHAVE_CONFIG_H  -g -O2   -c /var/tmp/uploadprogress/uploadprogress.c -o uploadprogress.lo

mkdir .libs

cc -I. -I/var/tmp/uploadprogress -DPHP_ATOM_INC -I/var/tmp/pear-build-root/uploadprogress-1.0.1/include -I/var/tmp/pear-build-root/uploadprogress-1.0.1/main -I/var/tmp/uploadprogress -I/usr/include/php -I/usr/include/php/main -I/usr/include/php/TSRM -I/usr/include/php/Zend -I/usr/include/php/ext -I/usr/include/php/ext/date/lib -DHAVE_CONFIG_H -g -O2 -c /var/tmp/uploadprogress/uploadprogress.c  -fPIC -DPIC -o .libs/uploadprogress.o

/bin/sh /var/tmp/pear-build-root/uploadprogress-1.0.1/libtool --mode=link cc -DPHP_ATOM_INC -I/var/tmp/pear-build-root/uploadprogress-1.0.1/include -I/var/tmp/pear-build-root/uploadprogress-1.0.1/main -I/var/tmp/uploadprogress -I/usr/include/php -I/usr/include/php/main -I/usr/include/php/TSRM -I/usr/include/php/Zend -I/usr/include/php/ext -I/usr/include/php/ext/date/lib  -DHAVE_CONFIG_H  -g -O2   -o uploadprogress.la -export-dynamic -avoid-version -prefer-pic -module -rpath /var/tmp/pear-build-root/uploadprogress-1.0.1/modules  uploadprogress.lo

cc -shared  .libs/uploadprogress.o   -Wl,-soname -Wl,uploadprogress.so -o .libs/uploadprogress.so

creating uploadprogress.la

(cd .libs && rm -f uploadprogress.la && ln -s ../uploadprogress.la uploadprogress.la)

/bin/sh /var/tmp/pear-build-root/uploadprogress-1.0.1/libtool --mode=install cp ./uploadprogress.la /var/tmp/pear-build-root/uploadprogress-1.0.1/modules

cp ./.libs/uploadprogress.so /var/tmp/pear-build-root/uploadprogress-1.0.1/modules/uploadprogress.so

cp ./.libs/uploadprogress.lai /var/tmp/pear-build-root/uploadprogress-1.0.1/modules/uploadprogress.la

PATH="$PATH:/sbin" ldconfig -n /var/tmp/pear-build-root/uploadprogress-1.0.1/modules

----------------------------------------------------------------------

Libraries have been installed in:

/var/tmp/pear-build-root/uploadprogress-1.0.1/modules


If you ever happen to want to link against installed libraries

in a given directory, LIBDIR, you must either use libtool, and

specify the full pathname of the library, or use the `-LLIBDIR'

flag during linking and do at least one of the following:

- add LIBDIR to the `LD_LIBRARY_PATH' environment variable

during execution

- add LIBDIR to the `LD_RUN_PATH' environment variable

during linking

- use the `-Wl,--rpath -Wl,LIBDIR' linker flag

- have your system administrator add LIBDIR to `/etc/ld.so.conf'


See any operating system documentation about shared libraries for

more information, such as the ld(1) and ld.so(8) manual pages.

----------------------------------------------------------------------


Build complete.

Don't forget to run 'make test'.


running: make INSTALL_ROOT="/var/tmp/pear-build-root/install-uploadprogress-1.0.1" install

Installing shared extensions:     /var/tmp/pear-build-root/install-uploadprogress-1.0.1/usr/lib/php/modules/

running: find "/var/tmp/pear-build-root/install-uploadprogress-1.0.1" | xargs ls -dils

27529277  4 drwxr-xr-x 3 root root  4096 Jul 22 00:48 /var/tmp/pear-build-root/install-uploadprogress-1.0.1

27529298  4 drwxr-xr-x 3 root root  4096 Jul 22 00:48 /var/tmp/pear-build-root/install-uploadprogress-1.0.1/usr

27529299  4 drwxr-xr-x 3 root root  4096 Jul 22 00:48 /var/tmp/pear-build-root/install-uploadprogress-1.0.1/usr/lib

27529300  4 drwxr-xr-x 3 root root  4096 Jul 22 00:48 /var/tmp/pear-build-root/install-uploadprogress-1.0.1/usr/lib/php

27529301  4 drwxr-xr-x 2 root root  4096 Jul 22 00:48 /var/tmp/pear-build-root/install-uploadprogress-1.0.1/usr/lib/php/modules

27529297 44 -rwxr-xr-x 1 root root 43639 Jul 22 00:48 /var/tmp/pear-build-root/install-uploadprogress-1.0.1/usr/lib/php/modules/uploadprogress.so


Build process completed successfully

Installing '/usr/lib/php/modules/uploadprogress.so'

install ok: channel://pecl.php.net/uploadprogress-1.0.1

configuration option "php_ini" is not set to php.ini location

You should add "extension=uploadprogress.so" to php.ini
3. add the extension to php.ini:
extension=uploadprogress.so
4. restart apache for the changes to take effect.
service httpd restart
2009/07/15
REHL: Install latest PHP (5.2.x) from Remi repository
A few app requires PHP 5.2.x but major repositories is yet support anything higher than 5.1.6 at this time. Recompile PHP is a pain also.
Remi maintains a repository that can save your 1 day or 2 if you have such need.
You now have Remi repository on your system. It's disabled by default, and I recommend you leave it as is. To install from remi, run the following:
I use remi to install php and its related stuff like GD, mcrypt, etc. As well as MySQL. The repository rocks!
Remi maintains a repository that can save your 1 day or 2 if you have such need.
cd /etc/yum.repos.d/

wget http://download.fedora.redhat.com/pub/epel/5/i386/epel-release-5-3.noarch.rpm

wget http://rpms.famillecollet.com/enterprise/remi-release-5.rpm

rpm -Uvh remi-release-5*.rpm epel-release-5*.rpm
You now have Remi repository on your system. It's disabled by default, and I recommend you leave it as is. To install from remi, run the following:
yum --enablerepo=remi update phpI use remi to install php and its related stuff like GD, mcrypt, etc. As well as MySQL. The repository rocks!
2009/07/07
Recover a disk failure for LVM (CentOS)
I've put together old hardware pieces at home for a download & file sharing box. It got 4 old disks (30G, 250G, 500G, 80G) together. Knowing that disks will out of its life sooner or later, I rsync important stuff to the mac next to it. Couple weeks ago, shit finally happen.
The broken disk is the 30G, so most of stuff are still in the other disks. To recover, I put into a new disk, re-install CentOS, so the box is bootable again. Now I need to re-activate and mount the old disks.
Re-install CentOS
1.Put in the new disk, go to Bios and make sure CD-ROM is having first boot priority, and the new disk is the boot disk in Hard Disk boot priority setting.
2.Put in the CentOS DVD, boot from it. In the install process, make sure you don’t re-partition the old disks.
3.If you are not sure what to do, you can un-plug the power cores of all old disks, install on the new disk first. Once the installation is finished, plug back the power of old disks, boot from DVD again, and reset the boot loader.
4.Now you’ve got a bootable box with all the disks in place.
RHEL systems like Red Hat, CentOS or Fedora, partition the disks automatically at install time. By default, it sets up the partitions using LVM for the root device.
By default, the OS set up a volume group called VolGroup00, with two logical volumes, LogVol00 and LogVol01, the first for the root directory and the second for swap.
Since the new disk is big enough, I set up the new disk (not using the volume). As you can see in the partition layout of physical disks below (/dev/sda is the new disk):
To re-activate and re-mount
vgchange is the utility to update/change your volume group attribute. Since one of the disk in previous volume is missing, I need to vgchange –ay –partial to activate the volume.
Well, a lot of error due to the missing disk, but the volume is active now. You can verify by:
Now you can mount the active volume by:
The old volume is now accessible at /mnt
What Next
I copy the stuff I want to recover. What to do with the old drives? I need to think about...Having a old box on all time is actually costly (in term of electric bill). But having a box on is handy in many occurrences..
Ref:
http://www.linuxjournal.com/article/8874
http://fedoraforum.org/forum/archive/index.php/t-64964.html
The broken disk is the 30G, so most of stuff are still in the other disks. To recover, I put into a new disk, re-install CentOS, so the box is bootable again. Now I need to re-activate and mount the old disks.
Re-install CentOS
1.Put in the new disk, go to Bios and make sure CD-ROM is having first boot priority, and the new disk is the boot disk in Hard Disk boot priority setting.
2.Put in the CentOS DVD, boot from it. In the install process, make sure you don’t re-partition the old disks.
3.If you are not sure what to do, you can un-plug the power cores of all old disks, install on the new disk first. Once the installation is finished, plug back the power of old disks, boot from DVD again, and reset the boot loader.
4.Now you’ve got a bootable box with all the disks in place.
RHEL systems like Red Hat, CentOS or Fedora, partition the disks automatically at install time. By default, it sets up the partitions using LVM for the root device.
By default, the OS set up a volume group called VolGroup00, with two logical volumes, LogVol00 and LogVol01, the first for the root directory and the second for swap.
Since the new disk is big enough, I set up the new disk (not using the volume). As you can see in the partition layout of physical disks below (/dev/sda is the new disk):
[root@xxx]# sfdisk -l


Disk /dev/hda: 19457 cylinders, 255 heads, 63 sectors/track

Units = cylinders of 8225280 bytes, blocks of 1024 bytes, counting from 0


Device Boot Start     End   #cyls    #blocks   Id  System

/dev/hda1   *      0+  19456   19457- 156288321   8e  Linux LVM

/dev/hda2          0       -       0          0    0  Empty

/dev/hda3          0       -       0          0    0  Empty

/dev/hda4          0       -       0          0    0  Empty


Disk /dev/hdc: 24792 cylinders, 255 heads, 63 sectors/track

Units = cylinders of 8225280 bytes, blocks of 1024 bytes, counting from 0


Device Boot Start     End   #cyls    #blocks   Id  System

/dev/hdc1   *      0+  24791   24792- 199141708+  8e  Linux LVM

/dev/hdc2          0       -       0          0    0  Empty

/dev/hdc3          0       -       0          0    0  Empty

/dev/hdc4          0       -       0          0    0  Empty


Disk /dev/sda: 38913 cylinders, 255 heads, 63 sectors/track

Units = cylinders of 8225280 bytes, blocks of 1024 bytes, counting from 0


Device Boot Start     End   #cyls    #blocks   Id  System

/dev/sda1   *      0+     12      13-    104391   83  Linux

/dev/sda2        267   38912   38646  310423995   83  Linux

/dev/sda3         13     266     254    2040255   82  Linux swap / Solaris

/dev/sda4          0       -       0          0    0  Empty


Disk /dev/sdb: 60801 cylinders, 255 heads, 63 sectors/track

Units = cylinders of 8225280 bytes, blocks of 1024 bytes, counting from 0


Device Boot Start     End   #cyls    #blocks   Id  System

/dev/sdb1   *      0+  60800   60801- 488384001   8e  Linux LVM

/dev/sdb2          0       -       0          0    0  Empty

/dev/sdb3          0       -       0          0    0  Empty

/dev/sdb4          0       -       0          0    0  Empty
To re-activate and re-mount
vgchange is the utility to update/change your volume group attribute. Since one of the disk in previous volume is missing, I need to vgchange –ay –partial to activate the volume.
[root@xxx]# vgchange –ay –partial

Couldn't find device with uuid 'AiegxE-NfQy-AA5E-OUcn-bvpY-UG3o-5oT1gY'.

/dev/mapper/VolGroup00-LogVol00-missing_3_0: read failed after 0 of 4096 at 0: Input/output error

/dev/mapper/VolGroup00-LogVol01-missing_0_0: read failed after 0 of 4096 at 0: Input/output error

/dev/VolGroup00/LogVol01: read failed after 0 of 4096 at 0: Input/output error

Couldn't find device with uuid 'AiegxE-NfQy-AA5E-OUcn-bvpY-UG3o-5oT1gY'.

2 logical volume(s) in volume group "VolGroup00" now active
Well, a lot of error due to the missing disk, but the volume is active now. You can verify by:
[root@xxx]# lvscan

/dev/VolGroup00/LogVol00: read failed after 0 of 4096 at 892413607936: Input/output error

/dev/VolGroup00/LogVol00: read failed after 0 of 4096 at 892413665280: Input/output error

/dev/mapper/VolGroup00-LogVol01-missing_0_0: read failed after 0 of 4096 at 2080309248: Input/output error

/dev/mapper/VolGroup00-LogVol01-missing_0_0: read failed after 0 of 4096 at 4096: Input/output error

/dev/mapper/VolGroup00-LogVol01-missing_0_0: read failed after 0 of 4096 at 0: Input/output error

/dev/VolGroup00/LogVol01: read failed after 0 of 4096 at 2080309248: Input/output error

/dev/VolGroup00/LogVol01: read failed after 0 of 4096 at 2080366592: Input/output error

Couldn't find device with uuid 'AiegxE-NfQy-AA5E-OUcn-bvpY-UG3o-5oT1gY'.

/dev/mapper/VolGroup00-LogVol00-missing_3_0: read failed after 0 of 4096 at 0: Input/output error

/dev/VolGroup00/LogVol01: read failed after 0 of 4096 at 0: Input/output error

Couldn't find device with uuid 'AiegxE-NfQy-AA5E-OUcn-bvpY-UG3o-5oT1gY'.

/dev/mapper/VolGroup00-LogVol00-missing_3_0: read failed after 0 of 4096 at 0: Input/output error

/dev/VolGroup00/LogVol01: read failed after 0 of 4096 at 0: Input/output error

Couldn't find device with uuid 'AiegxE-NfQy-AA5E-OUcn-bvpY-UG3o-5oT1gY'.

ACTIVE            '/dev/VolGroup00/LogVol00' [831.12 GB] inherit

ACTIVE            '/dev/VolGroup00/LogVol01' [1.94 GB] inherit
Now you can mount the active volume by:
[root@xxx]# mount /dev/VolGroup00/LogVol00 /mntThe old volume is now accessible at /mnt
[root@xxx]# ls –al /mntWhat Next
I copy the stuff I want to recover. What to do with the old drives? I need to think about...Having a old box on all time is actually costly (in term of electric bill). But having a box on is handy in many occurrences..
Ref:
http://www.linuxjournal.com/article/8874
http://fedoraforum.org/forum/archive/index.php/t-64964.html
2009/01/06
Network Time (NTP) service in CentOS
Synchronize the clocks is standard now-da-day. If you don't have NTP for some reason, here's how you set it up in CentOS.
First Install the NTP Package on your server as root.
Next set it to start automatically on a reboot
Tell it which NTP server it should update it’s time from
Verify that the Time & Date are correct
Finally start the service
First Install the NTP Package on your server as root.
# yum install ntp

Loading “fastestmirror” plugin

Loading mirror speeds from cached hostfile

* base: mirror.steadfast.net

* updates: mirrors.liquidweb.com

* addons: pubmirrors.reflected.net

* extras: pubmirrors.reflected.net

Setting up Install Process

Parsing package install arguments

Resolving Dependencies

–> Running transaction check

—> Package ntp.i386 0:4.2.2p1-8.el5.centos.1 set to be updated

–> Finished Dependency Resolution


Dependencies Resolved


=================================================================

Package                 Arch       Version          Repository        Size

=================================================================

Installing:

ntp                     i386       4.2.2p1-8.el5.centos.1  base              1.3 M


Transaction Summary

=================================================================

Install      1 Package(s)

Update       0 Package(s)

Remove       0 Package(s)


Total download size: 1.3 M

Is this ok [y/N]: y

Downloading Packages:

(1/1): ntp-4.2.2p1-8.el5. 100% |=========================| 1.3 MB    00:19

Running rpm_check_debug

Running Transaction Test

Finished Transaction Test

Transaction Test Succeeded

Running Transaction

Installing: ntp                          ######################### [1/1]


Installed: ntp.i386 0:4.2.2p1-8.el5.centos.1

Complete!
Next set it to start automatically on a reboot
# chkconfig ntpd on
Tell it which NTP server it should update it’s time from
# ntpdate pool.ntp.org

4 Aug 12:32:43 ntpdate[9540]: step time server 64.202.112.75 offset 1256.453048 sec
Verify that the Time & Date are correct
# date

Mon Aug  4 12:33:04 EDT 2008
Finally start the service
# service ntpd start

Starting ntpd:                                             [  OK  ]
2008/12/22
Beryl - change what u think about Linux UI
Beryl is an OpenGL accelerated desktop that seeks to provide a free, open source desktop experience to the community that reflects the wishes of the users. Above all else, the project seeks to listen to and respond to the requests of the user base...
Windows Vista (Aero) Vs Linux Ubuntu (Beryl) - The funniest videos are a click away
Installing Beryl On A CentOS 5.0 Desktop: http://www.howtoforge.com/beryl_centos5.0
Windows Vista (Aero) Vs Linux Ubuntu (Beryl) - The funniest videos are a click away
Installing Beryl On A CentOS 5.0 Desktop: http://www.howtoforge.com/beryl_centos5.0
Mount new disk on CentOS
1. Check what is the new hard disk device name with "fdisk -l", it should be something like /dev/sda. You can easily identify which is the new drive by running "mount" and finding the drive that exists in "fdisk -l" but is not mounted.
2. Create a partition on the new drive, (the sample code below assume the disk is /dev/sdd)
3. Create a filesystem on the new partition, we use ext3 file system.
4. Create a directory named whatever you like, this will be where you mount the new disk
5. Edit /etc/fstab an add a record for the new drive at the end of the file. This will make the server mount the drive automatically after reboot. Mount options (like noatime and nodiratime) can be added as a comma separated list of values after "defaults": "defaults,noatime,nodiratime"
Linux records information about when files were created and last modified as well as when it was last accessed. There is a cost associated with recording the last access time. Linux has a special mount option for file systems called
Mount the drive. "mount -a" just mounts everything according to /etc/fstab.
Reboot to make sure it starts ok with the new drive mounted.
mount; fdisk -l2. Create a partition on the new drive, (the sample code below assume the disk is /dev/sdd)
fdisk /dev/sdd3. Create a filesystem on the new partition, we use ext3 file system.
mkfs.ext3 /dev/sdd4. Create a directory named whatever you like, this will be where you mount the new disk
mkdir /backup5. Edit /etc/fstab an add a record for the new drive at the end of the file. This will make the server mount the drive automatically after reboot. Mount options (like noatime and nodiratime) can be added as a comma separated list of values after "defaults": "defaults,noatime,nodiratime"
echo "/dev/sdd /backup ext3 defaults 0 0" >> /etc/fstabLinux records information about when files were created and last modified as well as when it was last accessed. There is a cost associated with recording the last access time. Linux has a special mount option for file systems called
noatime that can be added to each line that addresses one file system in the /etc/fstab file. If a file system has been mounted with this option, reading accesses to the file system will no longer result in an update to the atime information associated with the file. The importance of the noatime setting is that it eliminates the need by the system to make writes to the file system for files which are simply being read. Since writes can be somewhat expensive, this can result in measurable performance gains.nodiratime does the same thing but for directories. I know the beginners guide says to use both mount options on file systems, but from others I've talked to and places I've read it seems noatime implies nodiratime because noatime is a superset and nodiratime is a subset used specifically to disable it for directories but leave it on for files, and when you use noatime, it does it for everything, files/dirsecho "/dev/sdd /backup ext3 rw,noatime,nodiratime 0 0" >> /etc/fstabMount the drive. "mount -a" just mounts everything according to /etc/fstab.
mount -aReboot to make sure it starts ok with the new drive mounted.
2008/12/20
MonoDevelop 1.91 on Cent OS
Last post we installed Mono 2.x run time. Here we will get MonoDevelop install on GNOME, for development environment.
First, here are the related software. You should have most of them when installing the run-time:
Now, we need make the required environment variables while we're building the IDE, as well in its run-time. So let's make it into shellscript called env.sh (or whatever you like it).
Now we are ready to build MonoDevelop from tarball source. The following packages are the minimum software needed - we will build them one-by-one:
gtk-sharp
Mono.Addins
Monodoc
Mono Tools
MonoDevelop
You should now able to start up MonoDevelop in GNOME, enjoy.
First, here are the related software. You should have most of them when installing the run-time:
yum install glib2-devel pango-devel gtk2-devel glade2-devel libgnome-devel \

gnome-desktop-devel gnome-panel-devel libgnomeprintui22-devel  \

gtksourceview-devel ruby ruby-rdoc gtkhtml38-devel wget
Now, we need make the required environment variables while we're building the IDE, as well in its run-time. So let's make it into shellscript called env.sh (or whatever you like it).
echo 'PATH="/opt/mono/bin:$PATH"' /opt/mono/env.sh

echo 'export PKG_CONFIG_PATH=/opt/mono/lib/pkgconfig' >> /opt/mono/env.sh

echo 'export LD_LIBRARY_PATH=/opt/mono/lib' >> /opt/mono/env.sh

echo 'source /opt/mono/env.sh' >> /opt/mono/env.sh


chmod +x /opt/mono/env.sh
Now we are ready to build MonoDevelop from tarball source. The following packages are the minimum software needed - we will build them one-by-one:
gtk-sharp
cd ~/

wget http://ftp.novell.com/pub/mono/sources/gtk-sharp212/gtk-sharp-2.12.5.tar.bz2

tar xjf gtk-sharp-2.12.5.tar.bz2

cd ./gtk-sharp-2.12.5

./configure --prefix=/opt/mono

make;make install
Mono.Addins
wget http://ftp.novell.com/pub/mono/sources/mono-addins/mono-addins-0.3.1.tar.bz2

cd ./mono-addins-0.3.1

./configure --prefix=/opt/mono

make;make install
Monodoc
wget http://ftp.novell.com/pub/mono/sources/monodoc/monodoc-2.0.zip

unzip monodoc-2.0.zip

cd ./monodoc-2.0

./configure --prefix=/opt/mono

make;make install
Mono Tools
wget http://ftp.novell.com/pub/mono/sources/mono-tools/mono-tools-2.0.tar.bz2

tar jfxv mono-tools-2.0.tar.bz2

cd ./mono-tools-2.0

./configure --prefix=/opt/mono

make;make install
MonoDevelop
wget http://ftp.novell.com/pub/mono/sources/monodevelop/monodevelop-1.9.1.tar.bz2

tar jfxv monodevelop-1.9.1.tar.bz2

cd ./monodevelop-1.9.1

./configure --prefix=/opt/mono

make;make install
You should now able to start up MonoDevelop in GNOME, enjoy.
2008/12/17
Mono 2.x on CentOS 5
Mono no longer packages for Red Hat distribution but still provide sources. Here we will grab the source code, and install manually on a Cent OS 5.2 box.
First off, make sure you have all the development tools installed:
Pre-Software requirement
At this time, Mono 2.0.1 is the latest. You can always check for new build at http://ftp.novell.com/pub/mono/sources-stable/
Getting all the needed Mono software
Unlike many other tutorials, we will install using "Java" style - the version # is included:
Let's make a desult symlink:,
This is needed when building xsp:
Now we are ready to compile:
You should now have mod_mono.so in /usr/lib/httpd/modules. Also you should have mod_server in /opt/mono/bin.
You directories should look like those:
Directory contents are as follows:
Restart web server
Make a simple test file named default.aspx:
If you see that message at http://localhost/default.aspx, congrad, there you have it!
First off, make sure you have all the development tools installed:
Pre-Software requirement
yum groupinstall "Development Tools"

yum install httpd build-essential gcc bzip bison pkgconfig glib-devel \

glib2-devel httpd-devel libpng-devel libX11-devel freetype fontconfig \

pango-devel ruby ruby-rdoc gtkhtml38-devel wget
At this time, Mono 2.0.1 is the latest. You can always check for new build at http://ftp.novell.com/pub/mono/sources-stable/
Getting all the needed Mono software
cd /root

wget http://ftp.novell.com/pub/mono/sources/mono/mono-2.0.1.tar.bz2

wget http://ftp.novell.com/pub/mono/sources/xsp/xsp-2.0.tar.bz2

wget http://ftp.novell.com/pub/mono/sources/mod_mono/mod_mono-2.0.tar.bz2

wget http://ftp.novell.com/pub/mono/sources/libgdiplus/libgdiplus-2.0.tar.bz2
Unlike many other tutorials, we will install using "Java" style - the version # is included:
mkdir /opt/mono-2.0.1
Let's make a desult symlink:,
ln -s /opt/mono-2.0.1 /opt/mono
This is needed when building xsp:
export PKG_CONFIG_PATH=/usr/lib/pkgconfig/:/opt/mono/lib/pkgconfig/:/usr/lib/
export PATH=/opt/mono/bin:$PATH
Now we are ready to compile:
tar jvfx mono-2.0.1.tar.bz2cd mono-2.0.1
./configure --prefix=/opt/mono-2.0.1
make; make install
tar jvfx xsp-2.0.tar.bz2cd ~/xsp-2.0
./configure --prefix=/opt/mono
make; make install
tar jvfx mod_mono-2.0.tar.bz2cd ~/mod_mono-2.0
./configure --prefix=/opt/mono --with-mono-prefix=/opt/mono --with-apr-config=/usr/lib/httpd/modules
make; make install
tar jvfx libgdiplus-2.0.tar.bz2
cd ~/libgdiplus-2.0

./configure

make; make install
You should now have mod_mono.so in /usr/lib/httpd/modules. Also you should have mod_server in /opt/mono/bin.
You directories should look like those:
Directory contents are as follows:
ls /opt/mono/bin/al mono-api-info al2 mono-api-info2 asp-state monodis asp-state2 mono-find-provides caspol mono-find-requires cert2spc monograph certmgr monolinker chktrust monop cilc monop2 dbsessmgr mono-service dbsessmgr2 mono-service2 disco mono-shlib-cop dtd2rng mono-test-install dtd2xsd mono-xmltool fastcgi-mono-server mozroots fastcgi-mono-server2 nunit-console gacutil nunit-console2 genxs pedump gmcs permview httpcfg prj2make ilasm resgen ilasm2 resgen2 installvst secutil jay setreg macpack sgen makecert signcode mbas smcs mconfig sn mcs soapsuds mjs sqlsharp mkbundle wsdl mkbundle2 wsdl2 mod-mono-server xbuild mod-mono-server2 xsd mono xsp mono-api-diff xsp2ls /opt/mono/lib/
libgdiplus.a             libmono-profiler-aot.so.0
libgdiplus.la            libmono-profiler-aot.so.0.0.0
libgdiplus.so            libmono-profiler-cov.a
libgdiplus.so.0          libmono-profiler-cov.la
libgdiplus.so.0.0.0      libmono-profiler-cov.so
libikvm-native.a         libmono-profiler-cov.so.0
libikvm-native.la        libmono-profiler-cov.so.0.0.0
libikvm-native.so        libmono.so
libmono.a                libmono.so.0
libmono.la               libmono.so.0.0.0
libMonoPosixHelper.a     libMonoSupportW.a
libMonoPosixHelper.la    libMonoSupportW.la
libMonoPosixHelper.so    libMonoSupportW.so
libmono-profiler-aot.a   mono
libmono-profiler-aot.la  pkgconfig
libmono-profiler-aot.so  xsp
ls /usr/lib/httpd/modules/
libphp5.so              mod_file_cache.so
mod_actions.so          mod_filter.so
mod_alias.so            mod_headers.so
mod_asis.so             mod_ident.so
mod_auth_basic.so       mod_imagemap.so
mod_auth_digest.so      mod_include.so
mod_authn_alias.so      mod_info.so
mod_authn_anon.so       mod_ldap.so
mod_authn_dbd.so        mod_log_config.so
mod_authn_dbm.so        mod_log_forensic.so
mod_authn_default.so    mod_logio.so
mod_authn_file.so       mod_mem_cache.so
mod_authnz_ldap.so      mod_mime_magic.so
mod_authz_dbm.so        mod_mime.so
mod_authz_default.so    mod_mono.so
mod_authz_groupfile.so  mod_mono.so.0.0.0
mod_authz_host.so       mod_negotiation.so
mod_authz_owner.so      mod_proxy_ajp.so
mod_authz_user.so       mod_proxy_balancer.so
mod_autoindex.so        mod_proxy_connect.so
mod_cache.so            mod_proxy_ftp.so
mod_cern_meta.so        mod_proxy_http.so
mod_cgid.so             mod_proxy.so
mod_cgi.so              mod_rewrite.so
mod_dav_fs.so           mod_setenvif.so
mod_dav.so              mod_speling.so
mod_dbd.so              mod_status.so
mod_deflate.so          mod_suexec.so
mod_dir.so              mod_unique_id.so
mod_disk_cache.so       mod_userdir.so
mod_dumpio.so           mod_usertrack.so
mod_env.so              mod_version.so
mod_expires.so          mod_vhost_alias.so
mod_ext_filter.so
And the mod_mono config file should be like this:
ls /etc/httpd/conf/mod_mono.conf

vi /etc/httpd/conf/mod_mono.conf<ifmodule> LoadModule mono_module /usr/lib/httpd/modules/mod_mono.so AddType application/x-asp-net .aspx AddType application/x-asp-net .asmx AddType application/x-asp-net .ashx AddType application/x-asp-net .asax AddType application/x-asp-net .ascx AddType application/x-asp-net .soap AddType application/x-asp-net .rem AddType application/x-asp-net .axd AddType application/x-asp-net .cs AddType application/x-asp-net .config AddType application/x-asp-net .Config AddType application/x-asp-net .dll DirectoryIndex index.aspx DirectoryIndex Default.aspx DirectoryIndex default.aspx </ifmodule>Let's move it to CentOS style:
mv /etc/httpd/conf/mod_mono.conf /etc/httpd/conf.d/mod_mono.conf
Restart web server
service httpd restart
Make a simple test file named default.aspx:
<%Response.Write("mono on centos - it works");%>If you see that message at http://localhost/default.aspx, congrad, there you have it!
訂閱:
意見 (Atom)
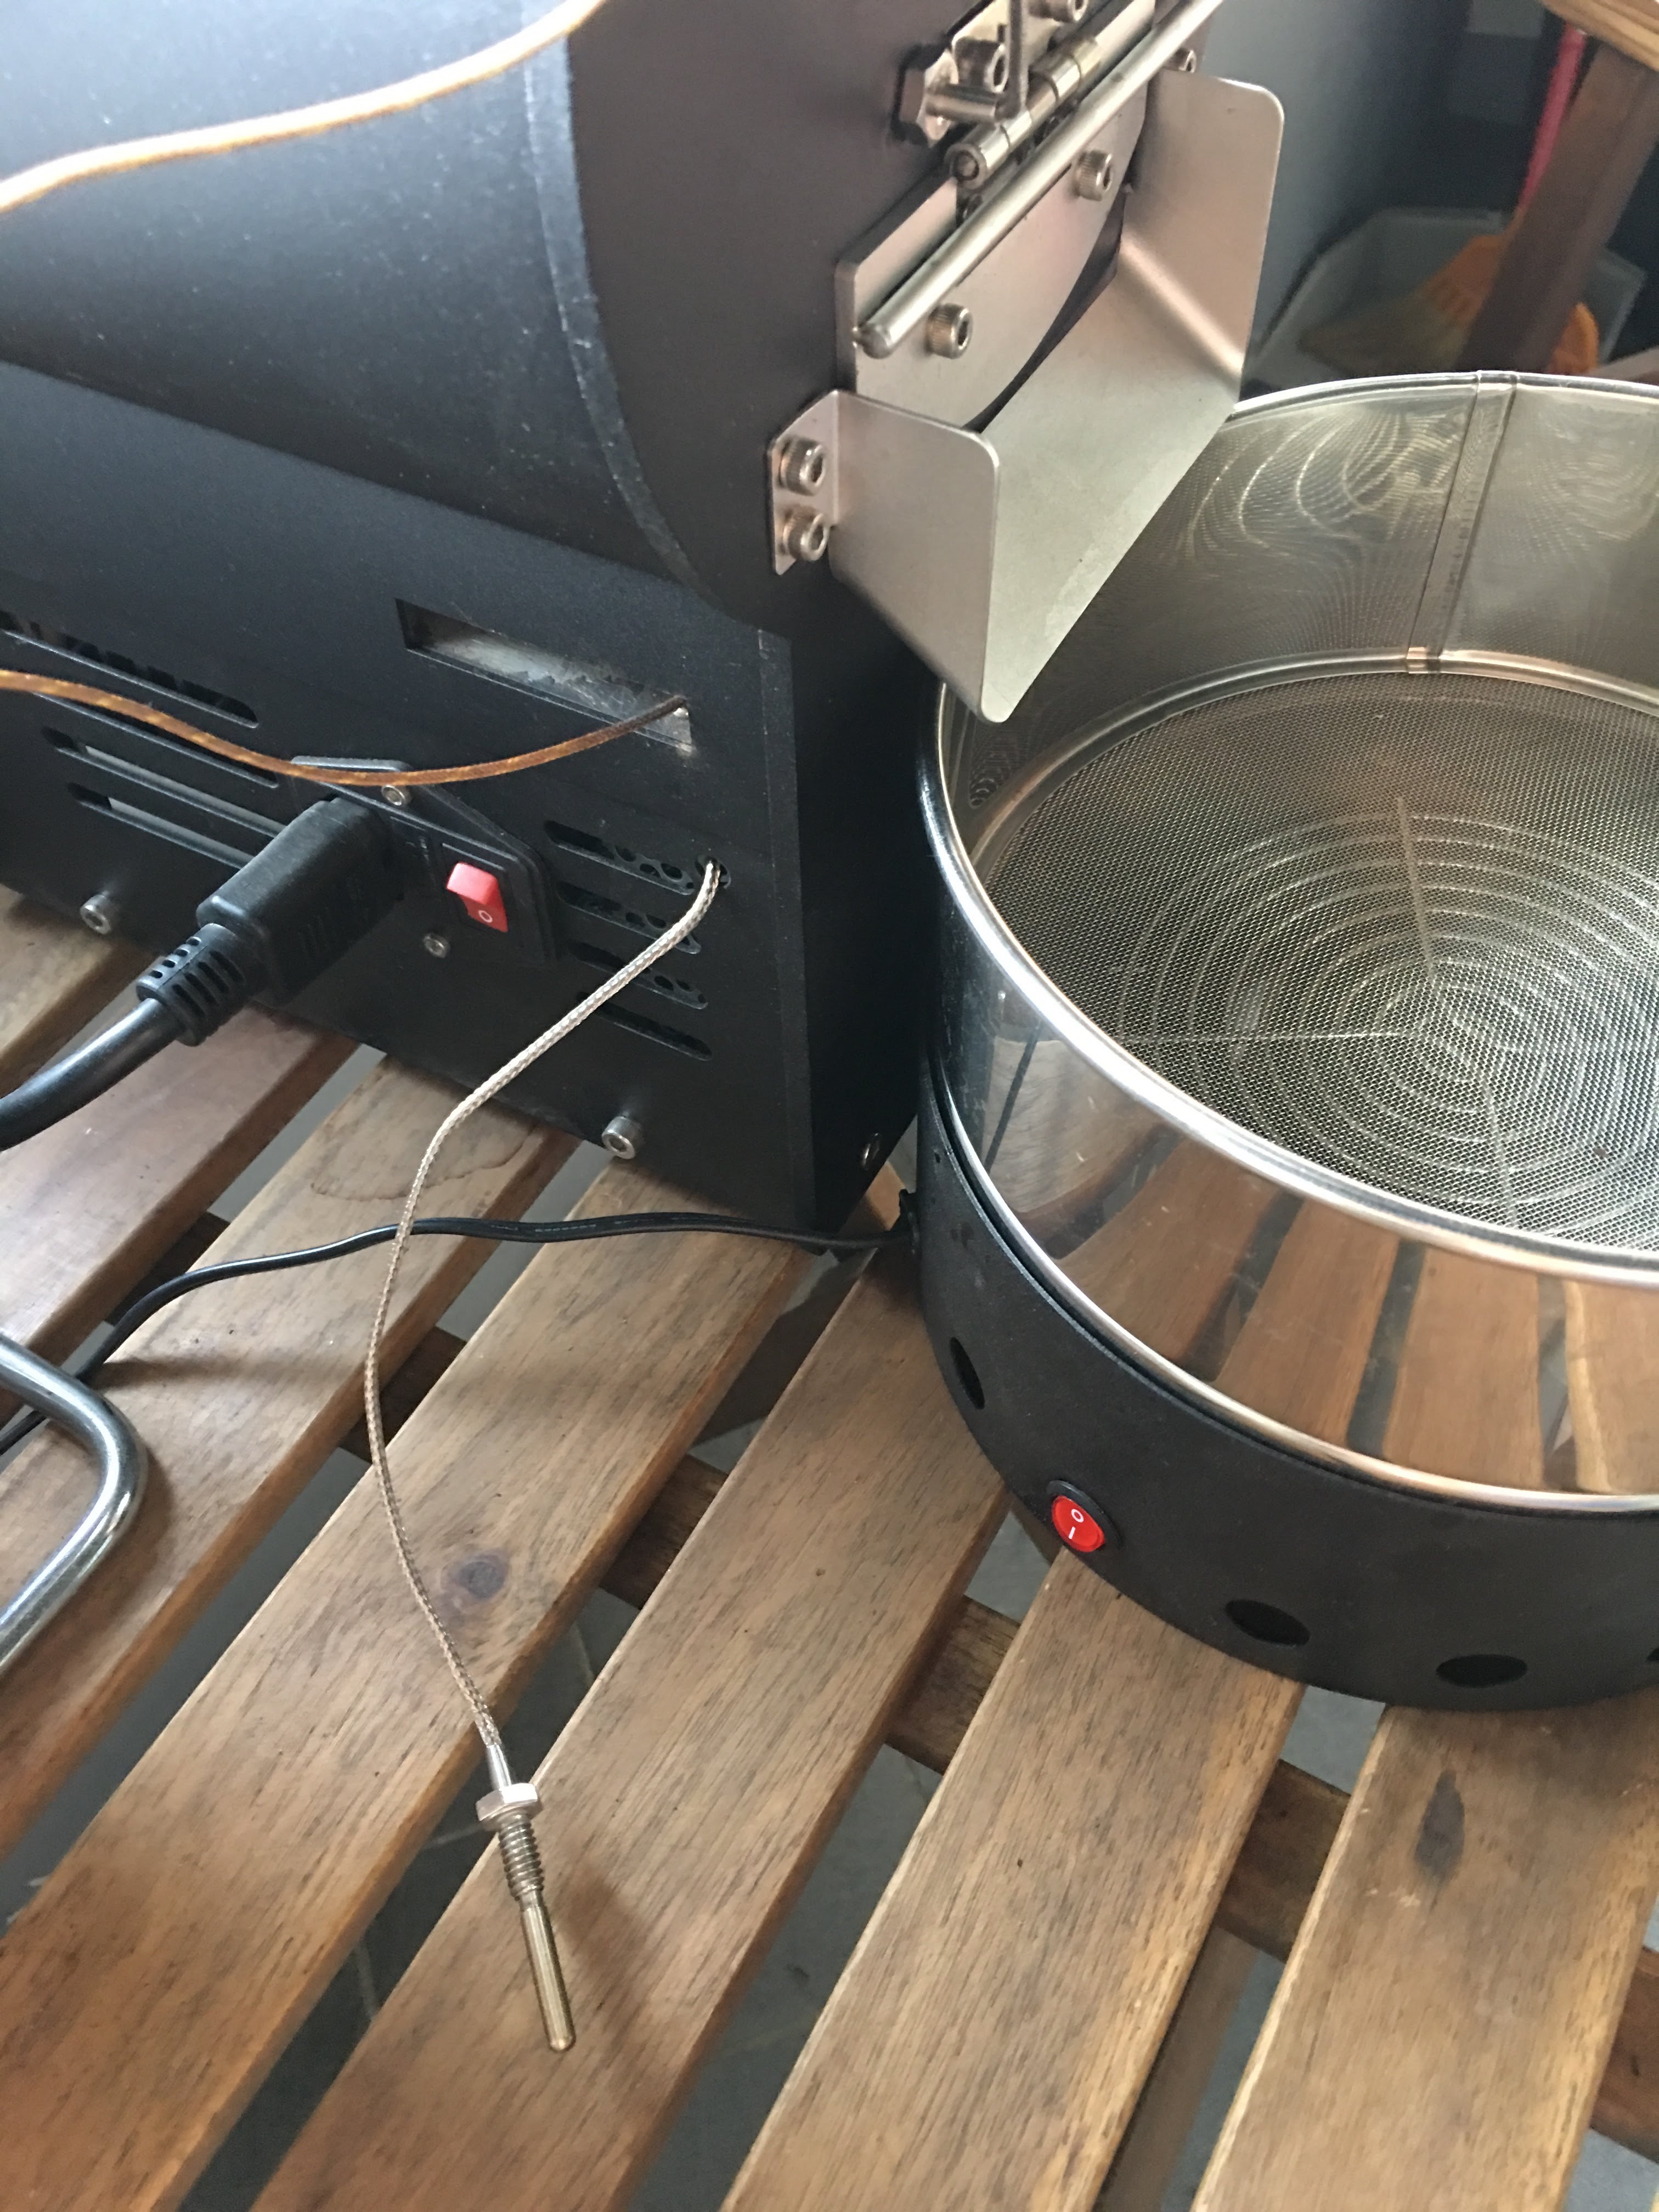
Mercury簡易改裝
有同好有一樣的困擾 - 如何使用自己的data logging軟體,因此寫了這篇來分享我的簡易改裝。 Background 雲豆子 MERCURY roaster 烘豆機的設計是使用自行開發的軟體,來:1. 操控風門/火力; 2. data logging/自動烘焙。 ...
-
有同好有一樣的困擾 - 如何使用自己的data logging軟體,因此寫了這篇來分享我的簡易改裝。 Background 雲豆子 MERCURY roaster 烘豆機的設計是使用自行開發的軟體,來:1. 操控風門/火力; 2. data logging/自動烘焙。 ...
-
最近這一整個月都在玩大風大火的烘焙。一些心得記錄一下: 2017-09-22 烘豆機: 雲豆子 MERCURY roaster 第1鍋 果丁丁 1 (生豆量:200g,熟豆:171.8g,失重:14.1%) 原本計畫:入豆溫:170 風門一路不變 (MERCURY...
-
 等了非常久的 Mercury 烘豆機 終於到貨了。找了水電來接220V就迫不及待開烘了。 Overall 這是一台CP值非常高的機器,可以說是目前(2017年5月)最接近貴森森營業機種的縮小版。 一應鉅全:有下豆槽,小型化的的風門,銀皮收集桶,跟風管。 ...

